
Welcome back to The Handcrafting Hideaway! Today I bring you another blog hop from DO Stamping with the Stars (DOswts)!

Today we have another Sketch Inspiration Hop, which means we use the layout sketch pictured below as inspiration to make our card.
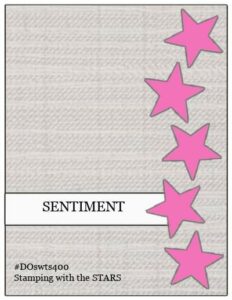
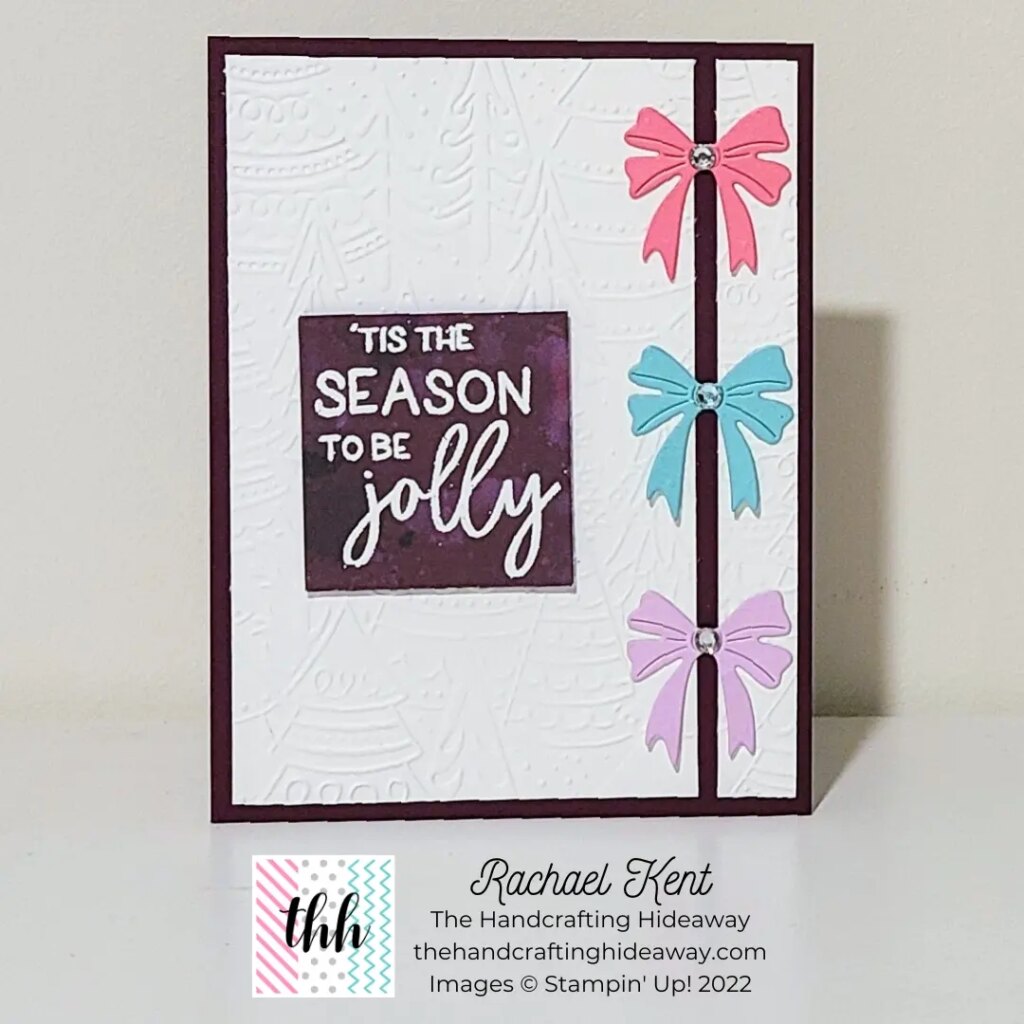
I put my own spin on this sketch. I’m doing a 30 Days of Christmas Card challenge over on Instagram and Facebook, so I decided to create a cute Christmas Card. I love these colors together and is a different color scheme than the traditional red and green.
SUPPLIES
Paper:
Blackberry Bliss: 8-1/2″ x 5-1/2″ (card base), scored at 4-1/4″
Basic White: 5-1/4″ x 4″ (for inside the card), 5-5/16″ x 3-13/16″ (for the front of the card)
Polished Pink: Square big enough for ribbon die cut
Coastal Cabana: Square big enough for ribbon die cut
Fresh Freesia: Square big enough for ribbon die cut
Pretty Prints DSP (or Blackberry Bliss): piece big enough for Sentiment
Ink: Versamark Ink Pad
Stamp Sets:
Framed & Festive Cling Stamp Set (Sentiment)
Dies/Embossing Folders:
Country Wreaths Dies (ribbon)
Whimsical Woodland 3D Embossing Folder
Embellishments:
Iridescent Rhinestones Basic Jewels
Tools:
White Embossing Powder
Heat Tool
Stampin’ Cut & Emboss Machine
Paper Trimmer
Adhesive:
Stampin’ Seal
Stampin’ Dimensionals
Stampin’ Mini Glue Dots
DIRECTIONS
1) Cut paper to the dimensions listed above.
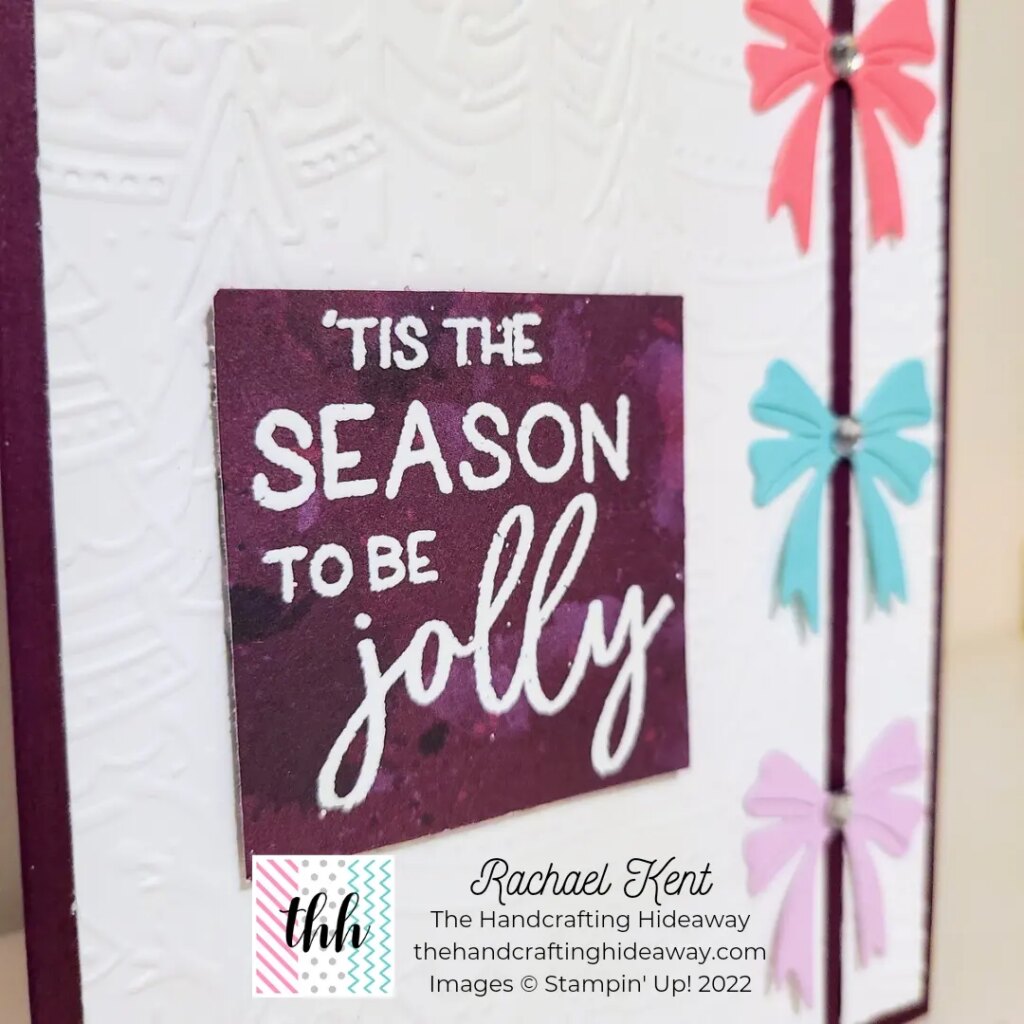
2) Take the 5-5/16″ x 3-13/16″ piece of Basic White cardstock and emboss it with the Whimsical Winter 3D Embossing Folder. The cardstock will be in the portrait direction on the card, so make sure the trees on the embossing folder are facing the correct direction.
3) With your Paper Trimmer cut 1/2″ off the right side of the cardstock you just embossed.
4) With your Stampin’ Cut & Embossing Machine, die cut a ribbon (from the Framed Festive Die set) out of the small squares of Polished Pink, Costal Cabana, and Fresh Freesia cardstock.
5) Ink your sentiment with the Versamark Ink Pad and stamp it on the piece of Pretty Prints DSP (or piece of Blackberry Bliss). Pour some white Embossing Powder on the sentiment and heat it with the Heat Tool.
6) Adhere the non-embossed piece of Basic White cardstock on the inside of the card using Stampin’ Seal.
7) Adhere the embossed piece of Basic White cardstock on the front of the card. Leave a 1/8″ strip of the Blackberry Bliss card base showing in between the 2 pieces.
8) Adhere the ribbon die cuts with mini glue dots. You’ll line of the center of the ribbons with the small strip of Blackberry Bliss you left showing in the previous step.
9) Put a medium sized rhinestone in the center of each ribbon.
10) Adhere the sentiment with Stampin’ Dimensionals.
Thank you so much for stopping by today! As always, make sure to live life creatively!
♥ Rachael Kent ♥
Want to get involved?
- Shop with Rachael
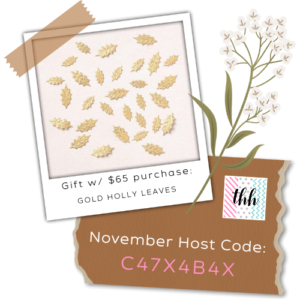
- December Host Code: C47X4B4X
- December Host Code Gift: Gold Holly Leaves (w/$65 order)
- Become a Paper Pumpkin Subscriber
- Join my Happy Handcrafters Team – $99 Starter Kit (You’ll get $125 worth of products for only $99!)
Product List
")


 Designer Series Paper")


")


1 Comment
I love the way that you split the embossed layer and placed the bows!